> ## Documentation Index
> Fetch the complete documentation index at: https://docs.demokraft.ai/llms.txt
> Use this file to discover all available pages before exploring further.
# Getting Started with DemoKraft AI Studio
> Welcome to our quick tutorial designed to guide you through setting up DemoKraft AI Studio efficiently.
Will see how setup your account, record a video with chrome extension, edit it in Studio editor and export it.
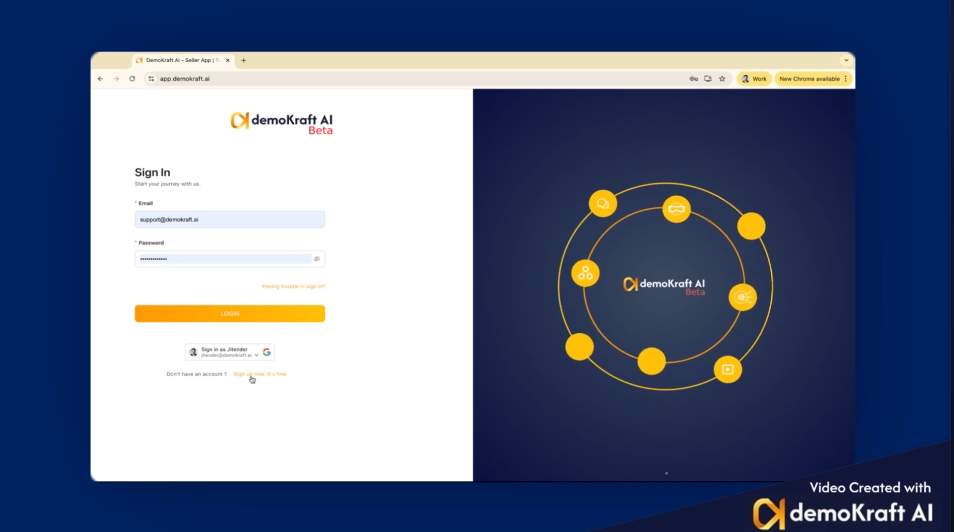
## Account Creation and Login
Begin by going to the DemoKraft AI page and selecting the 'Sign Up' button. This action directs you to a page where you can either log in or create a new account. If you don't have an account, register using your email and password, or simply log in through your Google account for a streamlined process. For demonstration, we use Google login.
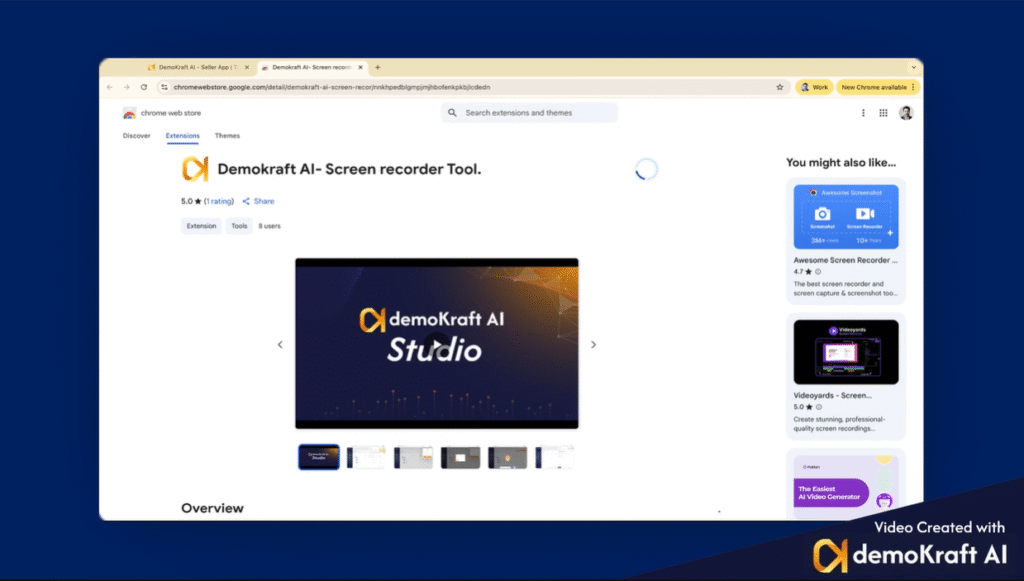
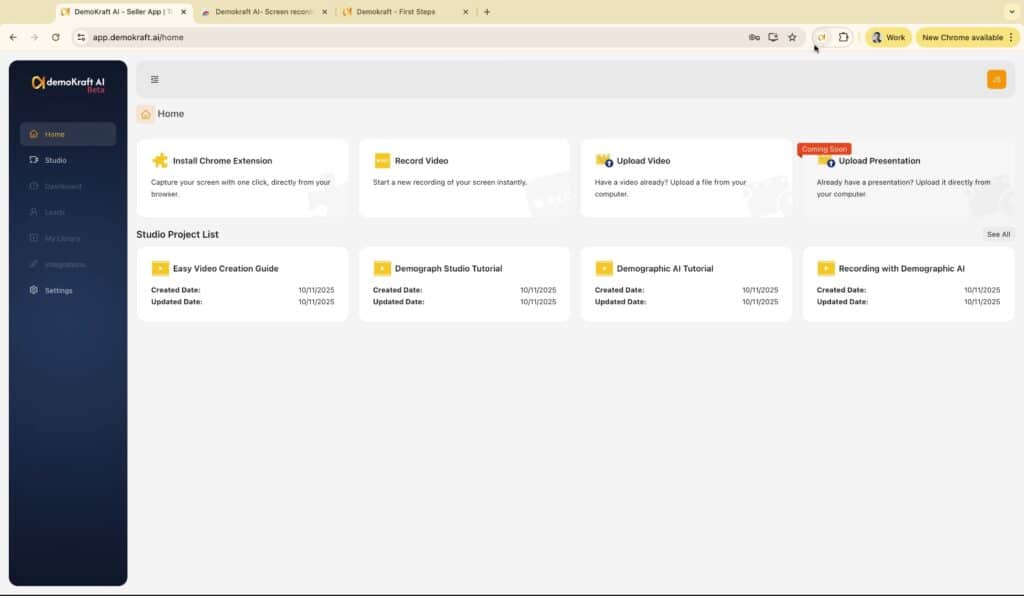
## Installing the Chrome Extension
After logging in, the next essential step is to install the DemoKraft Chrome extension. Click on the provided icon to navigate to the Chrome Web Store. There, click 'Add to Chrome' and then confirm by selecting 'Add Extension' to complete the installation seamlessly.
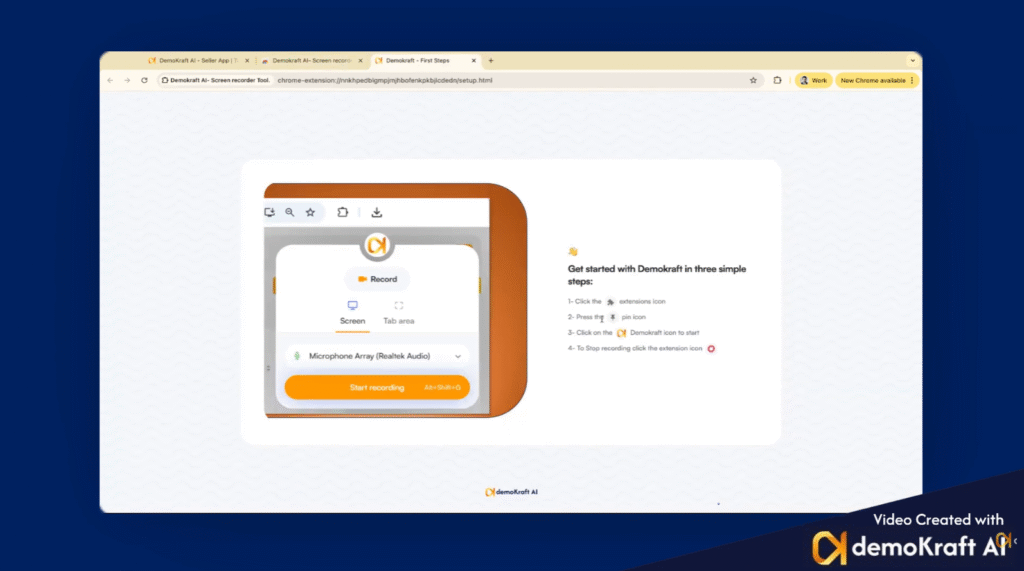
## Pinning the DemoKraft Icon for Quick Access
To improve accessibility, pin the DemoKraft icon to your browser toolbar. Simply click the pin icon beside the extension, ensuring that the extension is readily available whenever you need it. After pinning, you can return to the studio interface to continue your work.
## Recording Your Video with Voice
Next, initiate your video recording by clicking the DemoKraft icon, selecting 'Share your Screen', and starting the screen sharing process. When finished, stop the sharing via the option available on the icon. Ensure that your recording includes your voice, as this audio is necessary for subsequent processing and enhancement.
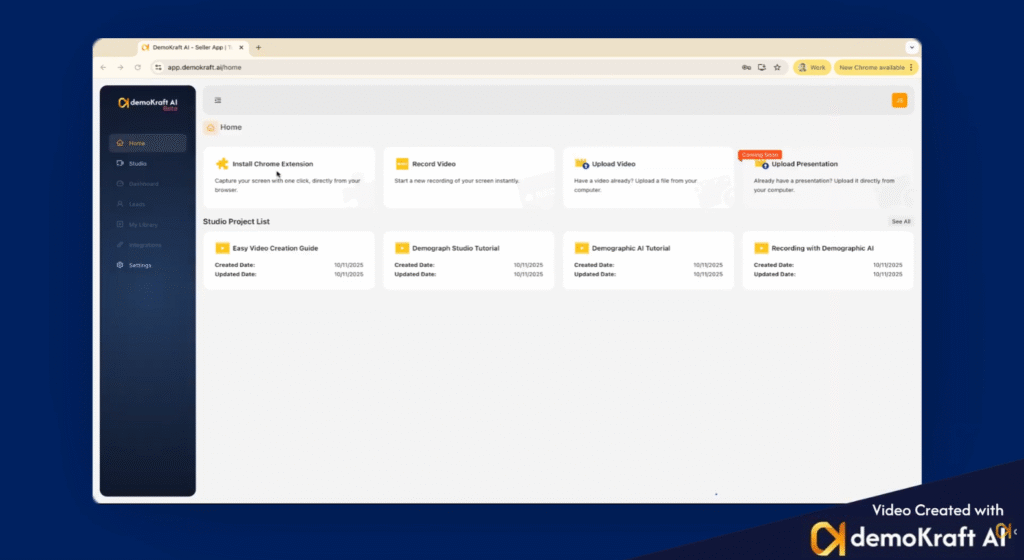
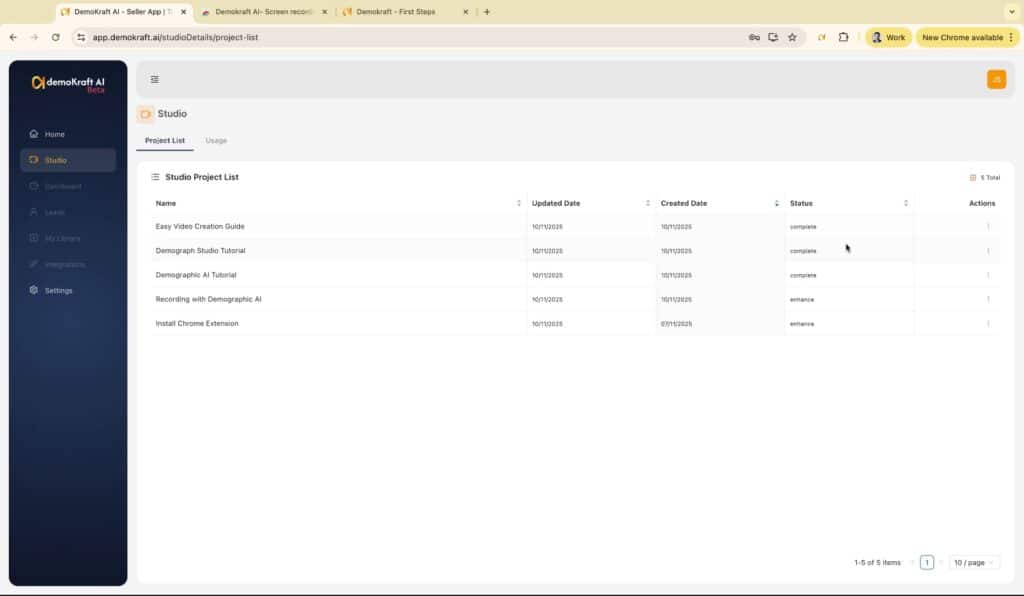
## Accessing Recorded Videos in Studio
Once your recording is complete, your video will appear in the Studio’s project list. You can select any video to open and work with in the Studio environment. For example, we will demonstrate with a previously recorded video.
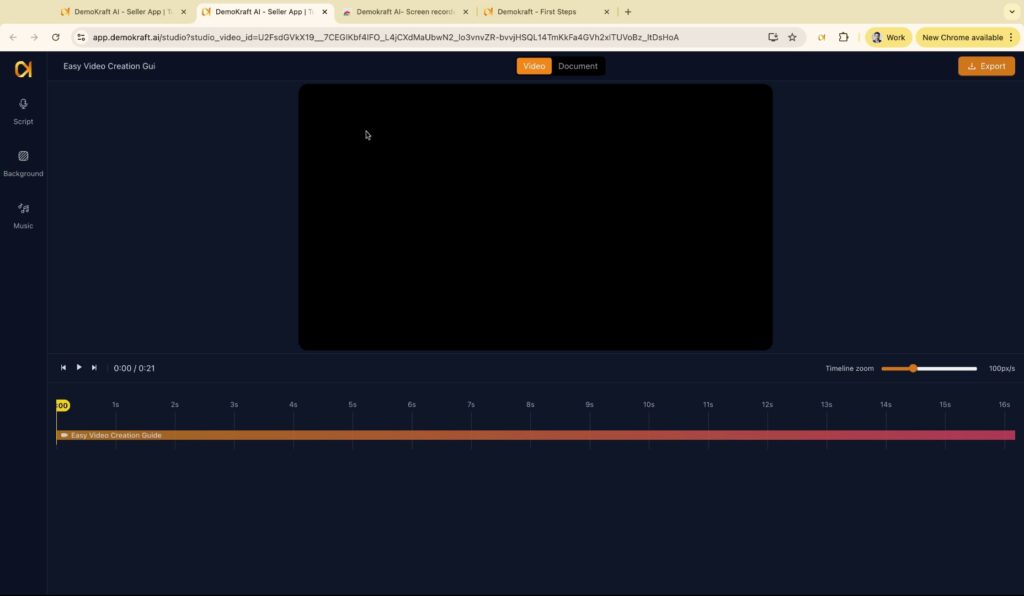
## Processing Video for Studio Quality
When you open a video in the Studio, it undergoes background processing to enhance its quality and prepare it for further editing. This enhancement process varies in duration depending on the file size, usually ranging from a few seconds to a minute.
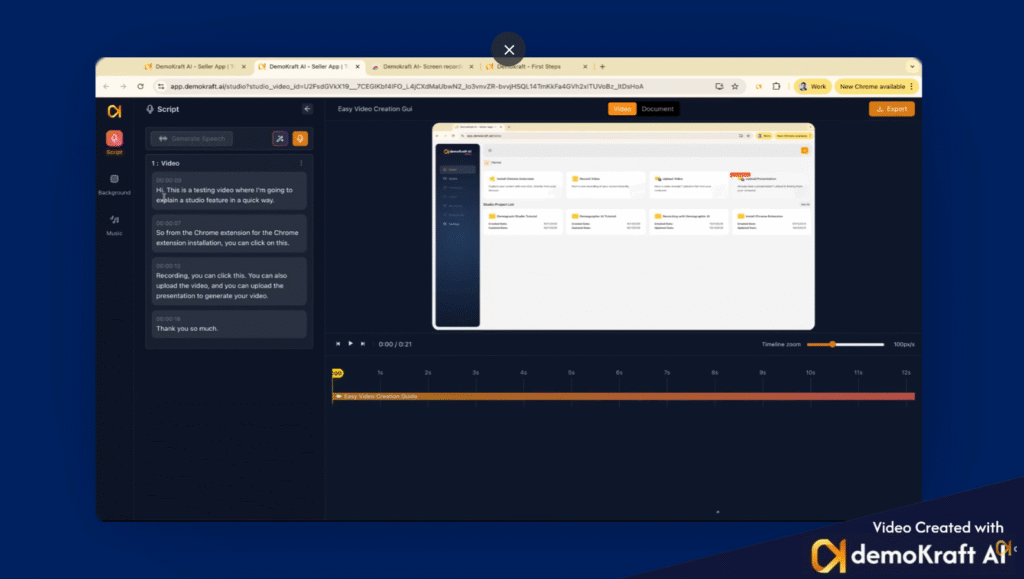
## Viewing and Editing the Script
Within the Studio, you will find the video's script displayed on the left side. This script is generated from your original voice recording, providing a textual representation that you can review and edit as needed.
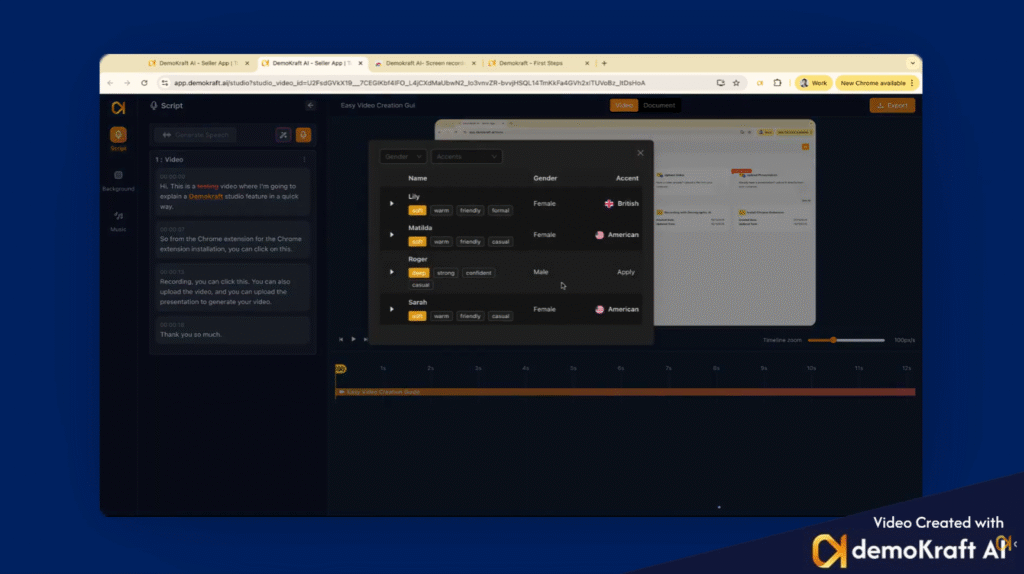
## Selecting Voices and Generating Voiceover
Once your script is finalized, choose a preferred voice from the available options to personalize your video narration. After selecting, such as 'Roger' in our example, click 'Generate Script Speech' to initiate the background generation of the new voiceover, then proceed to the next stage.
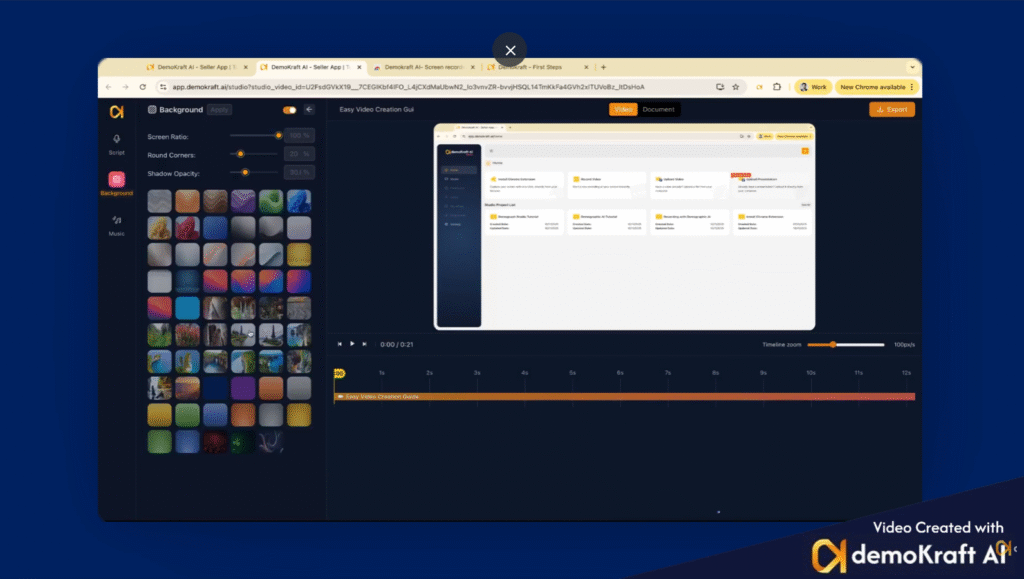
## Customizing Background and Visuals
Enable the background feature to assign a style that aligns with your brand identity. Adjust visual elements including screen ratio, corner shape, and shadow opacity to achieve the desired aesthetics. After customizing, click 'Apply' to commit these changes.
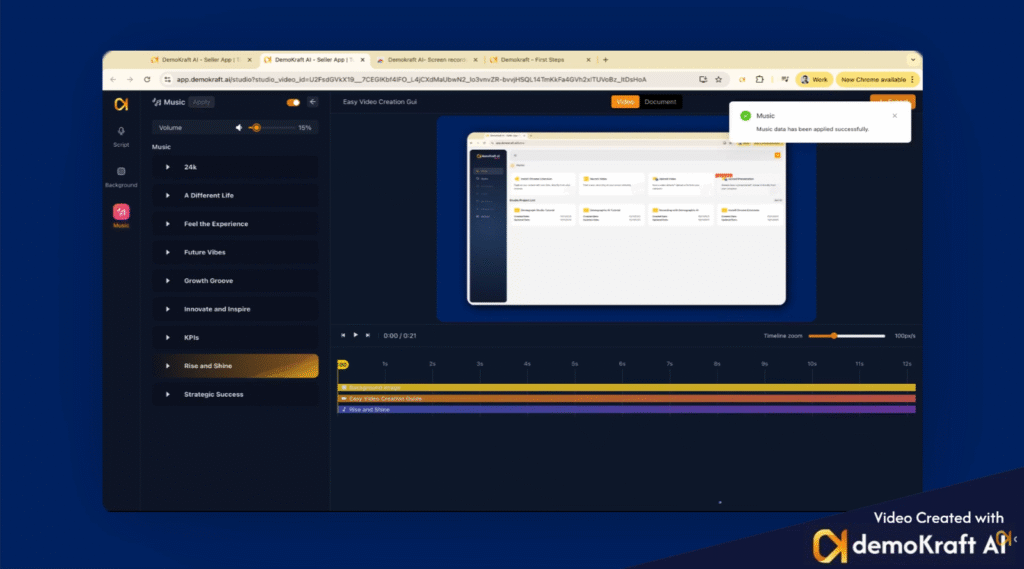
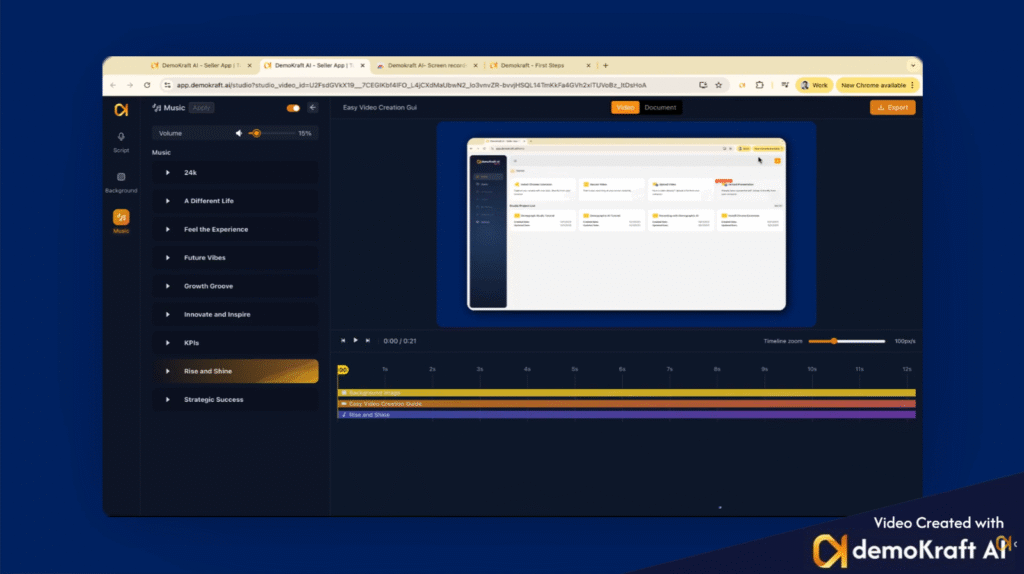
## Adding and Managing Background Music
Enhance your video's engagement by enabling the Background Music option. Select a suitable track, adjust its volume level for balance, and ensure it complements your content. After making selections, click 'Apply' to store your settings.
## Previewing Your Video
Before finalizing, play your video within the Studio to review all edits, ensuring the content and effects meet your expectations for quality and message clarity.
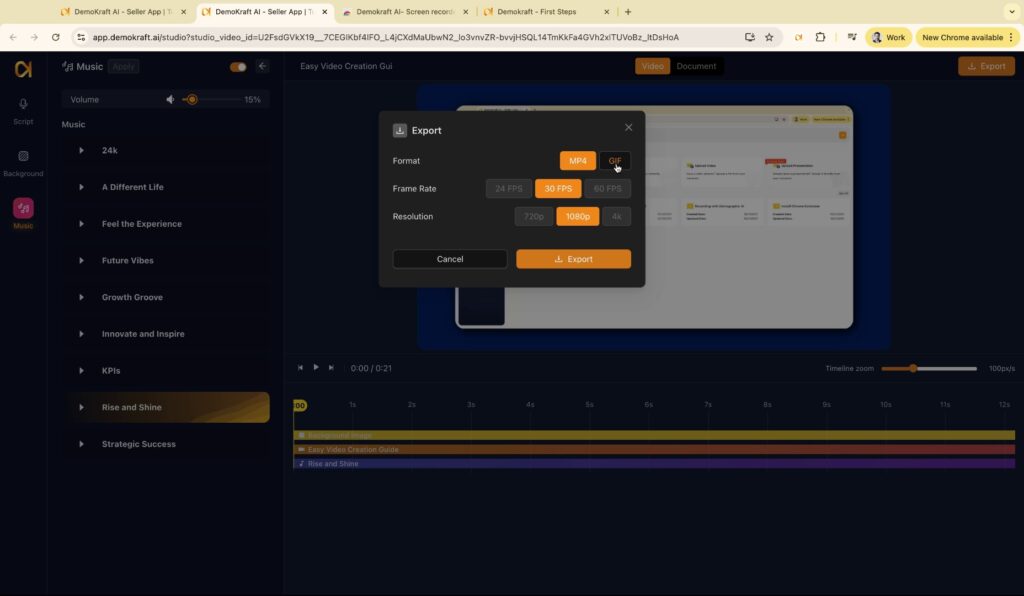
## Exporting Video in Desired Formats
When satisfied with your video, access the 'Export' option to download your work. Choose between MP4 format for videos or GIF format with selectable sizes to suit your distribution needs. After selection, proceed to export and retrieve your files.
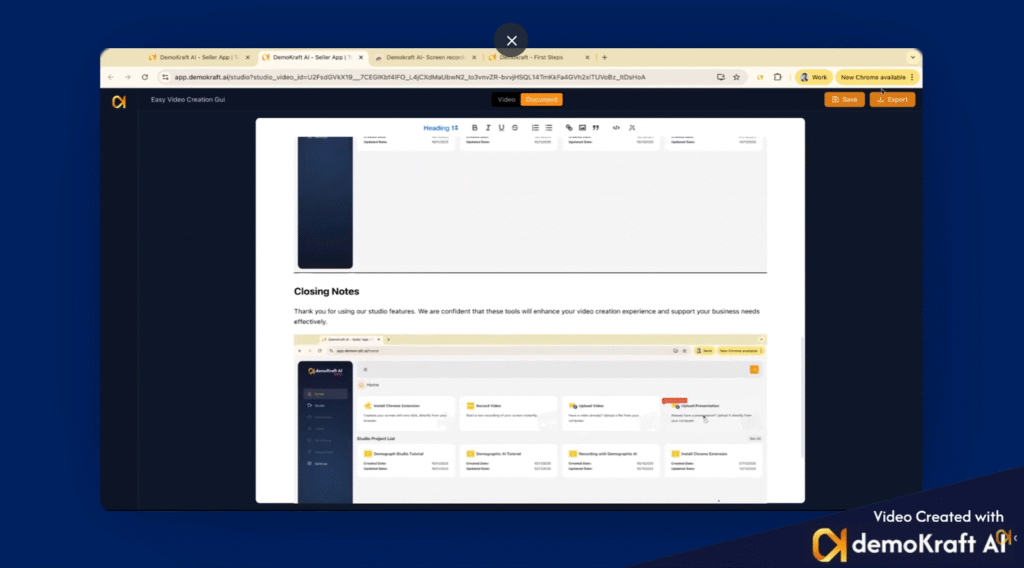
## Generating and Editing AI-Generated Articles
Beyond video, you can create an article from your recording by clicking the 'Document' feature. This uses AI to generate a comprehensive write-up including screenshots and details from your session.
In 'Edit Mode', you can adjust text, titles, and insert images. Capture screenshots by navigating to relevant video segments and adding them directly into the document. Always save your changes before exporting the final document for download.
## Closing Remarks
Thank you for following this guide. We're here to support you as you utilize DemoKraft AI Studio for your professional projects.
 ## Installing the Chrome Extension
After logging in, the next essential step is to install the DemoKraft Chrome extension. Click on the provided icon to navigate to the Chrome Web Store. There, click 'Add to Chrome' and then confirm by selecting 'Add Extension' to complete the installation seamlessly.
## Installing the Chrome Extension
After logging in, the next essential step is to install the DemoKraft Chrome extension. Click on the provided icon to navigate to the Chrome Web Store. There, click 'Add to Chrome' and then confirm by selecting 'Add Extension' to complete the installation seamlessly.
 ## Pinning the DemoKraft Icon for Quick Access
To improve accessibility, pin the DemoKraft icon to your browser toolbar. Simply click the pin icon beside the extension, ensuring that the extension is readily available whenever you need it. After pinning, you can return to the studio interface to continue your work.
## Pinning the DemoKraft Icon for Quick Access
To improve accessibility, pin the DemoKraft icon to your browser toolbar. Simply click the pin icon beside the extension, ensuring that the extension is readily available whenever you need it. After pinning, you can return to the studio interface to continue your work.
 ## Recording Your Video with Voice
Next, initiate your video recording by clicking the DemoKraft icon, selecting 'Share your Screen', and starting the screen sharing process. When finished, stop the sharing via the option available on the icon. Ensure that your recording includes your voice, as this audio is necessary for subsequent processing and enhancement.
## Recording Your Video with Voice
Next, initiate your video recording by clicking the DemoKraft icon, selecting 'Share your Screen', and starting the screen sharing process. When finished, stop the sharing via the option available on the icon. Ensure that your recording includes your voice, as this audio is necessary for subsequent processing and enhancement.
 ## Accessing Recorded Videos in Studio
Once your recording is complete, your video will appear in the Studio’s project list. You can select any video to open and work with in the Studio environment. For example, we will demonstrate with a previously recorded video.
## Accessing Recorded Videos in Studio
Once your recording is complete, your video will appear in the Studio’s project list. You can select any video to open and work with in the Studio environment. For example, we will demonstrate with a previously recorded video.
 ## Processing Video for Studio Quality
When you open a video in the Studio, it undergoes background processing to enhance its quality and prepare it for further editing. This enhancement process varies in duration depending on the file size, usually ranging from a few seconds to a minute.
## Processing Video for Studio Quality
When you open a video in the Studio, it undergoes background processing to enhance its quality and prepare it for further editing. This enhancement process varies in duration depending on the file size, usually ranging from a few seconds to a minute.
 ## Viewing and Editing the Script
Within the Studio, you will find the video's script displayed on the left side. This script is generated from your original voice recording, providing a textual representation that you can review and edit as needed.
## Viewing and Editing the Script
Within the Studio, you will find the video's script displayed on the left side. This script is generated from your original voice recording, providing a textual representation that you can review and edit as needed.
 ## Selecting Voices and Generating Voiceover
Once your script is finalized, choose a preferred voice from the available options to personalize your video narration. After selecting, such as 'Roger' in our example, click 'Generate Script Speech' to initiate the background generation of the new voiceover, then proceed to the next stage.
## Selecting Voices and Generating Voiceover
Once your script is finalized, choose a preferred voice from the available options to personalize your video narration. After selecting, such as 'Roger' in our example, click 'Generate Script Speech' to initiate the background generation of the new voiceover, then proceed to the next stage.
 ## Customizing Background and Visuals
Enable the background feature to assign a style that aligns with your brand identity. Adjust visual elements including screen ratio, corner shape, and shadow opacity to achieve the desired aesthetics. After customizing, click 'Apply' to commit these changes.
## Customizing Background and Visuals
Enable the background feature to assign a style that aligns with your brand identity. Adjust visual elements including screen ratio, corner shape, and shadow opacity to achieve the desired aesthetics. After customizing, click 'Apply' to commit these changes.
 ## Adding and Managing Background Music
Enhance your video's engagement by enabling the Background Music option. Select a suitable track, adjust its volume level for balance, and ensure it complements your content. After making selections, click 'Apply' to store your settings.
## Adding and Managing Background Music
Enhance your video's engagement by enabling the Background Music option. Select a suitable track, adjust its volume level for balance, and ensure it complements your content. After making selections, click 'Apply' to store your settings.
 ## Previewing Your Video
Before finalizing, play your video within the Studio to review all edits, ensuring the content and effects meet your expectations for quality and message clarity.
## Previewing Your Video
Before finalizing, play your video within the Studio to review all edits, ensuring the content and effects meet your expectations for quality and message clarity.
 ## Exporting Video in Desired Formats
When satisfied with your video, access the 'Export' option to download your work. Choose between MP4 format for videos or GIF format with selectable sizes to suit your distribution needs. After selection, proceed to export and retrieve your files.
## Exporting Video in Desired Formats
When satisfied with your video, access the 'Export' option to download your work. Choose between MP4 format for videos or GIF format with selectable sizes to suit your distribution needs. After selection, proceed to export and retrieve your files.
 ## Generating and Editing AI-Generated Articles
Beyond video, you can create an article from your recording by clicking the 'Document' feature. This uses AI to generate a comprehensive write-up including screenshots and details from your session.
In 'Edit Mode', you can adjust text, titles, and insert images. Capture screenshots by navigating to relevant video segments and adding them directly into the document. Always save your changes before exporting the final document for download.
## Generating and Editing AI-Generated Articles
Beyond video, you can create an article from your recording by clicking the 'Document' feature. This uses AI to generate a comprehensive write-up including screenshots and details from your session.
In 'Edit Mode', you can adjust text, titles, and insert images. Capture screenshots by navigating to relevant video segments and adding them directly into the document. Always save your changes before exporting the final document for download.
 ## Closing Remarks
Thank you for following this guide. We're here to support you as you utilize DemoKraft AI Studio for your professional projects.
## Closing Remarks
Thank you for following this guide. We're here to support you as you utilize DemoKraft AI Studio for your professional projects.