> ## Documentation Index
> Fetch the complete documentation index at: https://docs.demokraft.ai/llms.txt
> Use this file to discover all available pages before exploring further.
# Installing and Using the Demokraft AI Screen Recording Chrome Extension
> Learn how to install and use the Demokraft AI screen recording extension to capture and edit your screen activity.
## Introduction to Demokraft AI Screen Recording
This article explains how to install the Demokraft AI screen recording Chrome extension and how to use it for effective screen capture. The extension enables capturing screen activity directly through your browser for streamlined video creation and editing.
***
## Installing the Chrome Extension
1. Log into your **Demokraft AI account** via the web app portal.
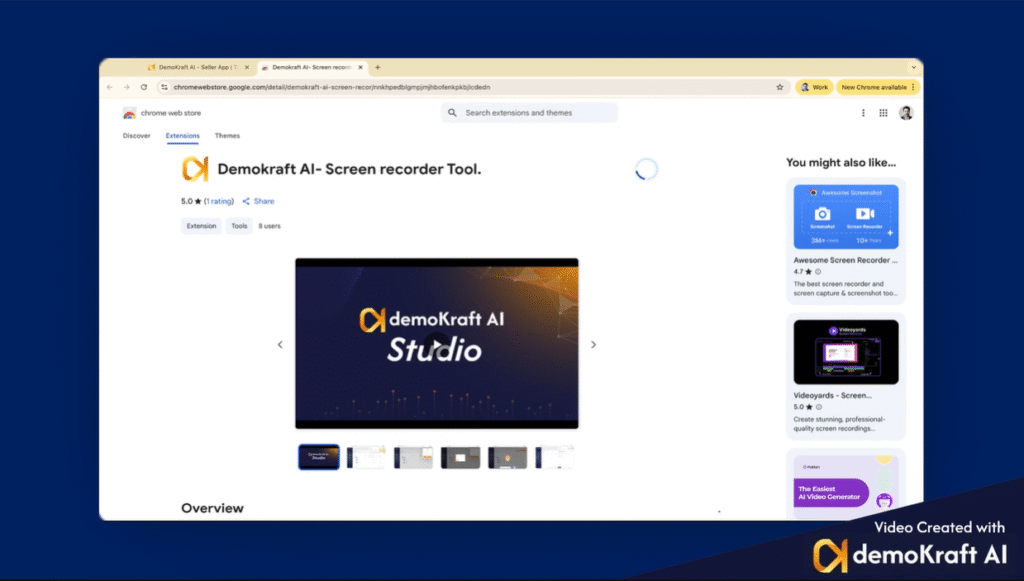
2. On the home page, locate the link to the Chrome extension and click it to open the extension's page directly in the [Chrome Web Store](https://chromewebstore.google.com/detail/demokraft-ai-screen-recor/nnkhpedblgmpjmjhbofenkpkbjlcdedn).
3. If you are installing the extension for the first time, click the **Add to Chrome** option to add the extension to your browser for immediate use.
4. After installation completes, instructions will be displayed.
The extension will appear in your browser's extension menu. We highly recommend **pinning it** for quick access. To stop recording sessions, click the stop icon available in the extensions list.
***
## Starting a Screen Recording Session
To begin recording:
* Open the browser tab that you want to capture.
* Click the **Demokraft AI** extension icon.
* *First-time users:* You will be prompted to log in to link the extension with your account.
* After logging in, a selection pop-up will appear where you can choose to record the **entire screen** or a **specific tab**.
* Select an appropriate microphone for audio input as needed.
* Click **Start Recording** to begin capturing your screen activity.
***
## Best Practices During Recording
* **Speak Clearly:** Ensure clear speech to maintain audio quality and avoid silent portions for better engagement.
* **Intentional Clicks:** Use your clicks intentionally, as they mark precise points in the video where screenshots will be captured.
* **Visual Presentation:** Maintain clear and visible visuals. While your audio and script can be edited later, the captured screen visuals are permanent and cannot be changed.
***
## Describe the Recording
You will then be prompted to provide a description of your recording. This description allows the application to understand the content's purpose and customize editing accordingly (e.g., *"first time app demonstration"*). After entering the description, click **Submit** to proceed.
***
## Screen Capture Permissions and Selection
After submitting your description, the browser requests permission to record your screen:
1. Choose to record either the **entire screen**, a **specific application window**, or a **single Chrome tab**.
2. Select the option that best fits your recording needs.
3. Once your selection is confirmed, a countdown will signal the start of the screen capture to allow you to prepare.
***
## Stopping Recording and Accessing the Editor
Upon completing your capture, click the stop button located at the top of the screen to finalize the recording.
You will be redirected automatically to the **Demokraft AI Studio editor**, where you can fine-tune your recorded video. This seamless workflow integrates recording and editing directly into one fluid process.

 ***
## Starting a Screen Recording Session
To begin recording:
* Open the browser tab that you want to capture.
* Click the **Demokraft AI** extension icon.
* *First-time users:* You will be prompted to log in to link the extension with your account.
* After logging in, a selection pop-up will appear where you can choose to record the **entire screen** or a **specific tab**.
* Select an appropriate microphone for audio input as needed.
* Click **Start Recording** to begin capturing your screen activity.
***
## Starting a Screen Recording Session
To begin recording:
* Open the browser tab that you want to capture.
* Click the **Demokraft AI** extension icon.
* *First-time users:* You will be prompted to log in to link the extension with your account.
* After logging in, a selection pop-up will appear where you can choose to record the **entire screen** or a **specific tab**.
* Select an appropriate microphone for audio input as needed.
* Click **Start Recording** to begin capturing your screen activity.

 ***
## Best Practices During Recording
* **Speak Clearly:** Ensure clear speech to maintain audio quality and avoid silent portions for better engagement.
* **Intentional Clicks:** Use your clicks intentionally, as they mark precise points in the video where screenshots will be captured.
* **Visual Presentation:** Maintain clear and visible visuals. While your audio and script can be edited later, the captured screen visuals are permanent and cannot be changed.
***
## Describe the Recording
You will then be prompted to provide a description of your recording. This description allows the application to understand the content's purpose and customize editing accordingly (e.g., *"first time app demonstration"*). After entering the description, click **Submit** to proceed.
***
## Best Practices During Recording
* **Speak Clearly:** Ensure clear speech to maintain audio quality and avoid silent portions for better engagement.
* **Intentional Clicks:** Use your clicks intentionally, as they mark precise points in the video where screenshots will be captured.
* **Visual Presentation:** Maintain clear and visible visuals. While your audio and script can be edited later, the captured screen visuals are permanent and cannot be changed.
***
## Describe the Recording
You will then be prompted to provide a description of your recording. This description allows the application to understand the content's purpose and customize editing accordingly (e.g., *"first time app demonstration"*). After entering the description, click **Submit** to proceed.
 ***
## Screen Capture Permissions and Selection
After submitting your description, the browser requests permission to record your screen:
1. Choose to record either the **entire screen**, a **specific application window**, or a **single Chrome tab**.
2. Select the option that best fits your recording needs.
3. Once your selection is confirmed, a countdown will signal the start of the screen capture to allow you to prepare.
***
## Screen Capture Permissions and Selection
After submitting your description, the browser requests permission to record your screen:
1. Choose to record either the **entire screen**, a **specific application window**, or a **single Chrome tab**.
2. Select the option that best fits your recording needs.
3. Once your selection is confirmed, a countdown will signal the start of the screen capture to allow you to prepare.
 ***
## Stopping Recording and Accessing the Editor
Upon completing your capture, click the stop button located at the top of the screen to finalize the recording.
You will be redirected automatically to the **Demokraft AI Studio editor**, where you can fine-tune your recorded video. This seamless workflow integrates recording and editing directly into one fluid process.
***
## Stopping Recording and Accessing the Editor
Upon completing your capture, click the stop button located at the top of the screen to finalize the recording.
You will be redirected automatically to the **Demokraft AI Studio editor**, where you can fine-tune your recorded video. This seamless workflow integrates recording and editing directly into one fluid process.